Your Cart is Empty
Spring is just around the corner, bringing with it a burst of color, fresh blooms, and a sense of new beginnings. What better way to celebrate the season than with some stunning flower nails? Whether you're looking for something delicate and minimalist or bold and vibrant, floral nails are the perfect way to add a little springtime magic to your look.
These 5 simple flower nail designs are easy to recreate at home, so you can embrace the beauty of the season without needing to leave your doorstep. Ready to get creative with your nails? Let’s explore five gorgeous flower nail designs that will have you feeling all the Spring vibes.
![]()
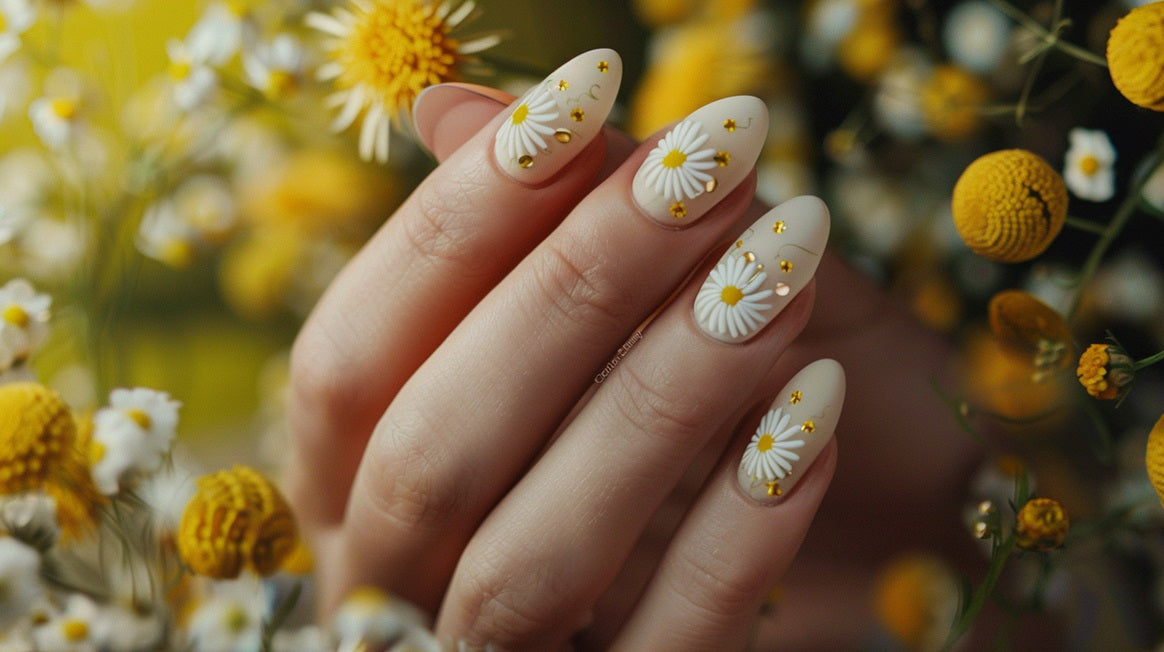
Simple flower nails are the top choice this season! The Clear Floral Manicure is a lovely idea for anyone who enjoys a subtle, feminine touch with a hint of nature. This design focuses on minimalism and elegance, with bright floral accents blooming against a sheer or nude base. It’s simple yet stunning – ideal for those who want something refined but still playful.
Prep your nails and start by applying aclear base coat to create a clean canvas for your flowers.
Using a finenail art brush, paint small, intricate flowers across your nails. You can mix and match colors to create a varied floral effect – soft pastels like pinks, oranges, and yellows work beautifully for this design.
Usingdark green nail polish, add stems, leaves, and tiny accent dots for extra details, which will make the flowers pop even more.
Finish off with a top coat to add shine and protect your design. This will also help it last longer.
The Clear Floral Manicure is perfect for both casual outings and more formal events. Floral nails are a great choice for spring weddings, brunches, or just as an everyday look to brighten up your day. Plus, they’re simple enough to recreate at home, even for beginners! You don’t have to paint a detailed floral design - a more minimalistic look will look just as great.

The Sakura Tree Manicure is a beautiful tribute to the iconic cherry blossoms that mark the arrival of spring. This floral nails design captures the essence of the season, with soft pink hues symbolizing the delicate blooms of spring and bold black branches representing the strength of nature. The contrast between the light flowers and dark branches is sure to make heads turn!
Begin with asoft pink base coat to mimic the subtle tones of cherry blossoms.
Use a fine nail art brush or a thin tool to paint the black branches, creating a flowing, organic design across your nails.
Add delicate pink dots and tiny flowers along the branches to create the look of blossoming petals. You can use a dotting tool or a fine brush to create this detail.
For a flawless finish, top it all off with amatte top coat to give it a smooth, velvety look.
|
Pro Tip from Ella Mila 💅If you want to achieve a smooth finish, let each layer dry completely before applying the next - especially when adding the black branches - to avoid smudging. |

The matte black floral manicure is for anyone who loves to turn heads with something unexpected. This design takes the softness of flowers and gives them a rebellious edge by pairing them with a striking matte black base.
The unique contrast between the dark backdrop and vibrant blooms creates a look that's impossible to ignore - it’s edgy, it’s daring, and it’s all about embracing your bold side!
Prep your nails and begin by applying ablack base coat.
Use a fine nail art brush to paint bold, bright flowers in shades of red, pink, or orange, with intricate black details in the center to create depth and dimension.
Add white accents for the branches, giving the flowers a soft, delicate look against the bold black background.
Finish with a matte top coat to maintain the velvety effect and seal in your design.
|
Try This! 💅If you want the flowers to stand out even more, add a touch of glossy top coat to the flower centers or petals, creating a subtle shine contrast against the matte finish. |

The tulip manicure is a charming and elegant way to celebrate spring without overwhelming your nails with too much detail. The beauty of this look lies in its simplicity - by using accent nails for the tulip artwork and keeping the rest of your nails minimalistic and sleek, you create a design that’s bold and balanced at the same time. It’s bold and chic, all thanks to the solid base color used for the non-accent nails and tulip petals.
Prep your nails as usual and start by applying a solid color, like aclassic red, to the majority of your nails for a clean and simple look.
Choose one or two accent nails where you’ll add the tulip design. Usenude nail polish as your base color.
For the accent nails nails, use a fine brush and the same red nail polish to paint delicate tulip shapes, adding subtle details to the petals for a realistic effect.
Add green leaves beneath the tulips to complete the design.
Seal your nails with aglossy top coat to ensure a smooth finish and added shine.
|
Ella Mila Says... 🌷Keep the tulip design on just one or two accent nails to let the flowers take center stage while the rest of the nails remain simple and understated. This balance makes the tulips pop without being overpowering. |

Do you miss summer more than spring? If yes, you simply must recreate this Tropical Flowers manicure idea. No other design will offer you the vibrant, bold look that brings the warmth of tropical paradise to your nails! And it’s all about embracing color - bright florals mixed with lush green leaves create a lively, fresh style that feels like a burst of sunshine.
Shape, buff, and prep your nails.
Start by applying a neutral orwhite base coat to make the vibrant colors of the flowers truly stand out.
Use a fine brush to paint large, colorful flowers in shades of pink, yellow, andorange nail polish.
Add details to the flowers by painting dark centers and lighter accents to create depth.
Fill in the spaces with bold, green tropical leaves to balance the flowers and add richness to the design.
Seal the design with a glossy top coat to lock in the vibrant colors and ensure a smooth, lasting finish.
|
Pro Tips 🌺 The key to this design islayering. Start with the flowers and then add the leaves around them to create depth and dimension. 🌺 Don’t be afraid to mix bold colors and experiment with different shapes and sizes for the flowers - this will give your tropical manicure a lively, organic feel. |
Spring is the perfect time to get creative with your nails, and these flower-inspired designs are just the way to add a little seasonal flair. Whether you're looking for something fresh and bright or a bit more daring, there’s a design here to match every mood and occasion.
The beauty of these flower design nails is that they’re simple to achieve yet full of impact, which makes them perfect for anyone wanting to try something new.
Ready to bring your nail art to life? Explore ournail polish collection and find the perfect shades to make your spring designs truly shine. Plus, be sure tovisit our blog for more creative tips and inspiration to keep your nails fresh, fun, and on trend as the seasons change!


