Your Cart is Empty
Nail shaping is where the magic begins! Before the polish, before the top coat - your nail shape sets the vibe. A soft oval can add elegance, a crisp square feels bold, and a tapered almond brings just the right touch of glam. Shaping your nails the right way can instantly elevate your entire manicure.
In this guide, you’ll learn how to shape nails step by step, using easy techniques and the right tools. From natural nail shapes to statement styles, we’ll help you find your favorite, and show you exactly how to file nails like a pro. So grab your buffer, get comfy, and let’s shape things up!
Want the short version? Here’s your cheat sheet to nail shaping:
Before we jump straight into the nitty-gritty details of different nail shapes, we should talk a little about why the nail shape even matters.
Just like a frame enhances the beauty of a painting, the shape of your nails can significantly impact the overall look and feel of your manicure. Think of it as the starting point in any nail shaping guide: before you even get into colors or nail art, you decide on the shape that feels like you.
Nail shape has the power to accentuate your hand's natural features, complement your personal style, and even enhance the appearance of your fingers: natural nail shapes like round or squoval offer a clean, effortless look, while almond and stiletto shapes bring extra flair.
In short - the shape you choose can highlight your style, boost your confidence, and create a balanced, put-together feel, no polish required!
With that, here are the most popular shapes of nails and what sets apart each of them.

Soft, simple, and effortlessly classic. Round nails follow the natural curve of your fingertip and offer a clean, low-maintenance look that never goes out of style.
Learning how to shape your nails into a round style is perfect if you’re just starting out. Here's how to do it step by step:
Round nails are easy to keep up - just file every week or so to maintain the shape and avoid snags. Don’t forget to hydrate your cuticles and use a nail strengthener to keep things healthy underneath the polish.

Elegant, elongating, and oh-so flattering. Oval nails follow the curve of your cuticle and end in a softly tapered tip, creating a more extended, feminine silhouette.
Oval nails are a go-to in any nail shape guide! They’re versatile and easy to shape at home with the right file.
Oval nails can flatten out over time, so touch up the curve weekly with gentle filing. Keep your nails moisturized, and avoid rough filing on the sides to protect strength and shape. A base coat or nail strengthener can help maintain durability.

Chic, tapered, and totally glam. Almond nails are shaped to resemble the silhouette of an almond - slim along the sides with a softly pointed tip that elongates the fingers beautifully.
Mastering how to shape your nails into this style takes a bit more precision - but the payoff is polished and gorgeous.
Because almond nails taper toward the tip, they can be more prone to breakage - especially if your nails are soft. Keep them strong with regular use of a nail hardening treatment and base coat, and avoid using your nails as tools. A weekly shape-up will keep the almond curve nicely crisp and balanced!

Sharp, structured, and striking. Square nails feature straight sidewalls and a flat, squared-off tip, creating a bold, clean-lined look that never goes unnoticed.
If you love crisp edges and a sleek finish, here’s how to shape your nails into a perfect square:
Square nails hold their shape well but can catch on things if the corners are too sharp. Gently buff the edges and re-file weekly to maintain the structure. This shape pairs beautifully with high-gloss polish or bold nail art - you can try a matte top coat to keep the finish flawless and unique.

Balanced, practical, and effortlessly pretty. Squoval nails are the perfect mix of square and oval - flat across the top with softly rounded corners for a natural yet refined finish.
This shape is ideal if you're learning how to shape nails step by step because it’s forgiving, flattering, and super wearable.
Squoval nails are easy to maintain and less likely to snag or break. Just keep the corners rounded and the tip even with occasional filing. A nourishing almond cuticle oil can help keep the whole area looking fresh and hydrated between polishes.

Edgy, elegant, and ultra-modern. Coffin nails, also known as ballerina nails, are long and tapered with a flat, squared-off tip. They’re sleek, dramatic, and loved for their high-impact look.
This shape takes a little more work, but the results are worth it. Here’s how to file nails into that signature coffin silhouette:
Coffin nails need regular shaping to keep the taper sharp and the edges clean. Because the tips are flat and narrow, they can be more fragile - so treat them gently and support nail strength with a hydrating nail care routine. This shape looks amazing in bold colors, glossy nudes, or graphic designs.

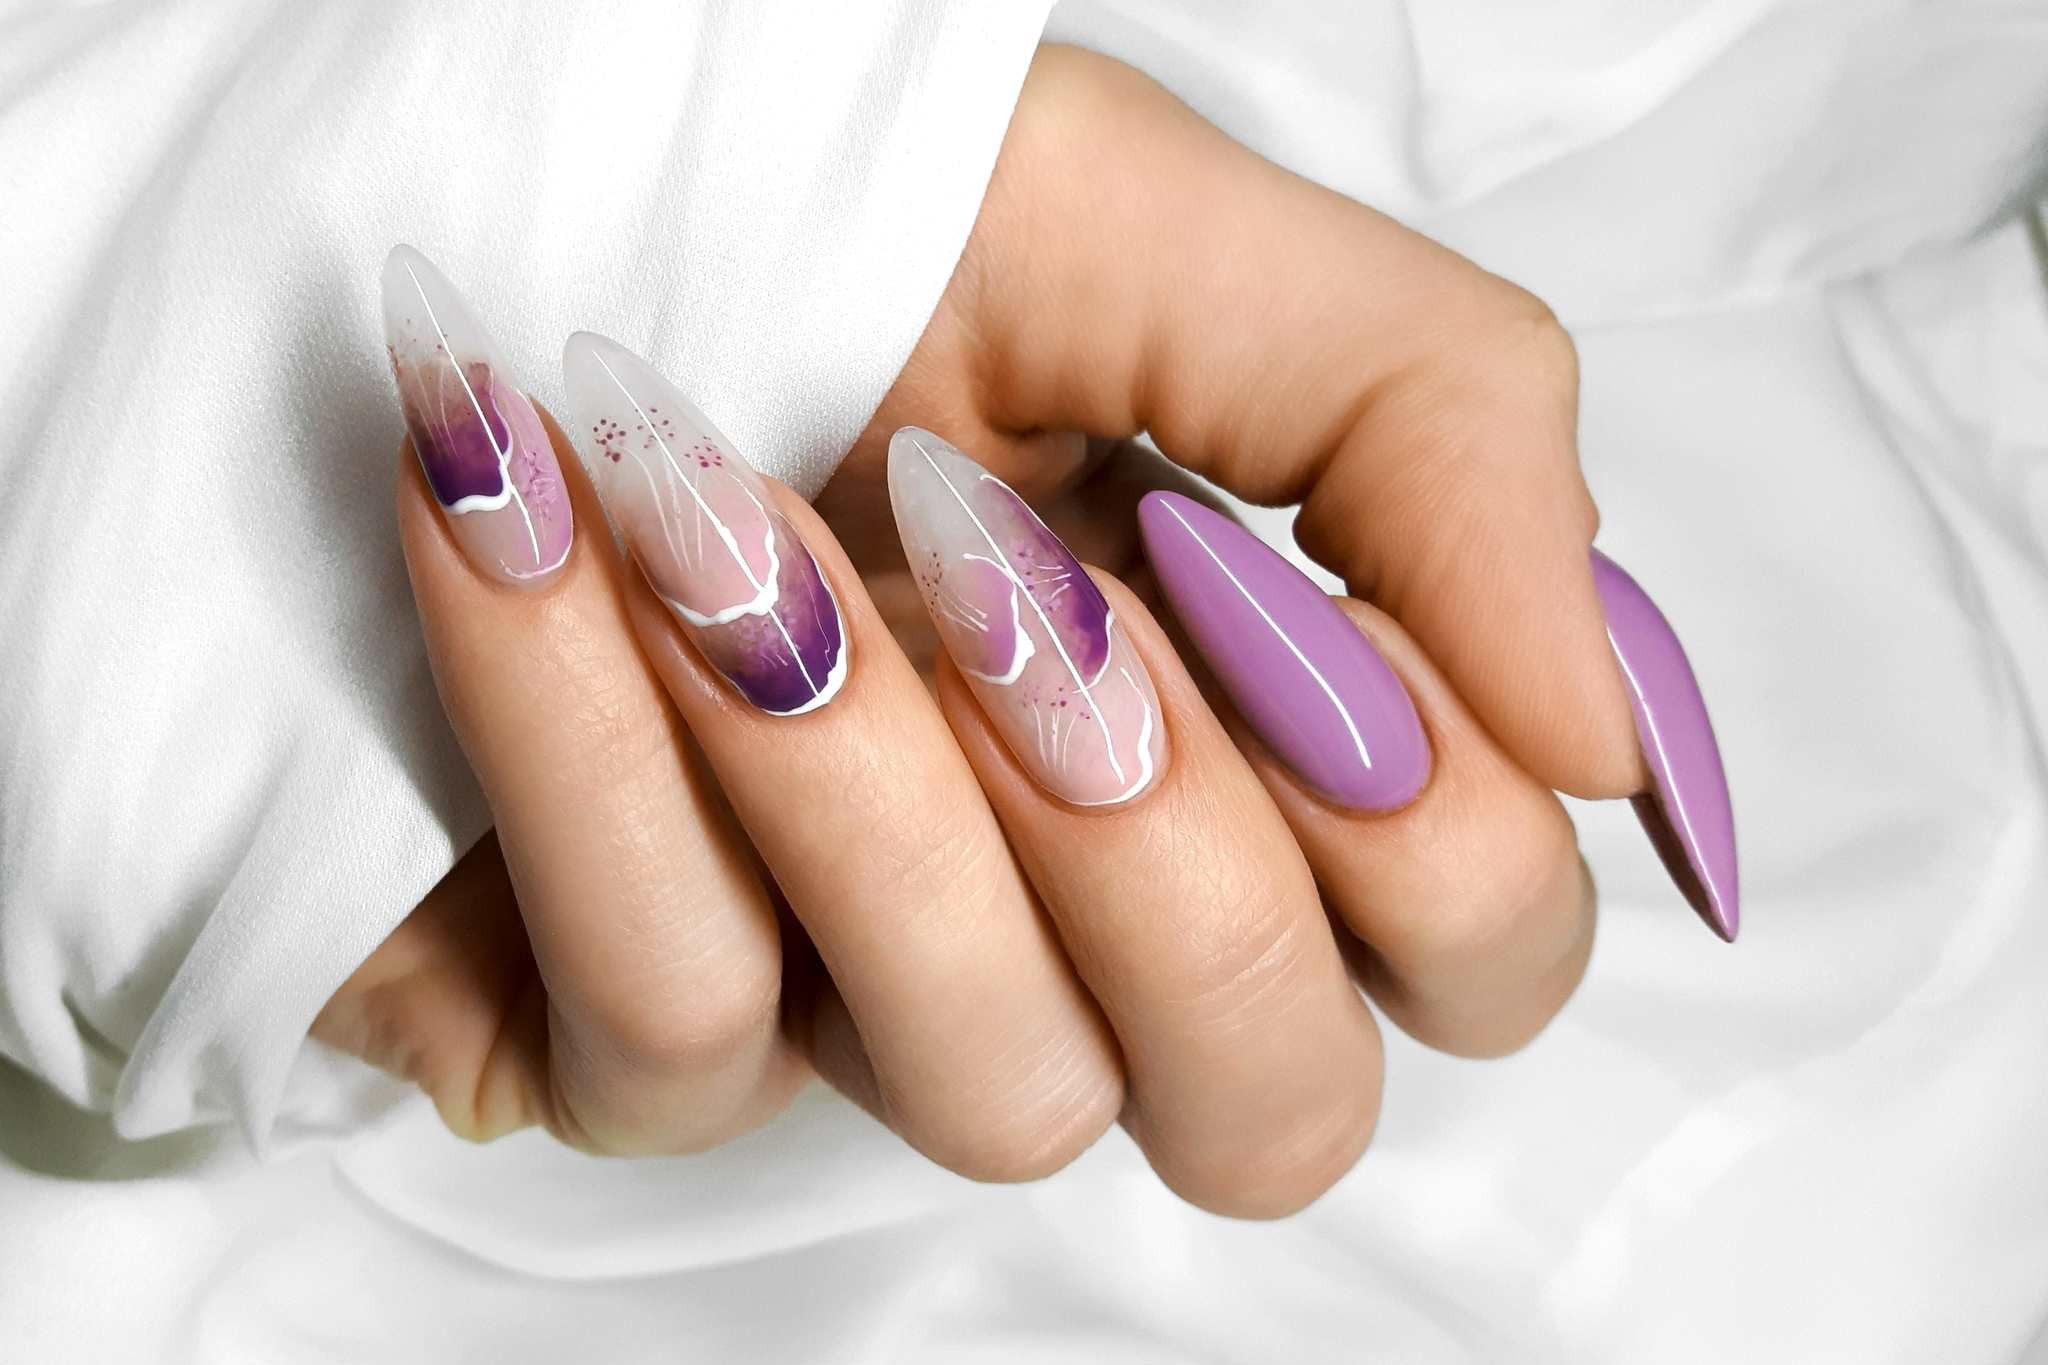
Fierce, fearless, and made to stand out. Stiletto nails are long and sharply tapered to a point - like your favorite pair of heels, but for your hands. They turn heads, spark conversations, and leave a lasting impression.
This nail shape is best for experienced DIYers or done with a little help from a nail tech, but here’s how to shape your nails in this style at home:
Stiletto nails are stunning, but they’re also high-maintenance. Because of the length and pointed tip, they’re more prone to breakage, so use a strengthening base coat and avoid any pressure that could cause stress on the nail. Moisturize regularly and file carefully to keep the shape looking sharp.
Choosing the right nail shape can feel tricky, but this quick nail shaping guide makes it simple. Use the chart below to see how to shape your nails, which styles suit different finger types, and how much upkeep each look requires.
If you’re learning how to shape your nails at home, start with the basics. These simple tips will help you file nails safely, avoid common mistakes, and keep your manicure looking polished from the very first try.
Once you’ve mastered these basics, shaping nails into round or squoval styles is a great place to begin. From there, you can work your way up to almond, coffin, or even stiletto tips.
Every manicure starts with a choice: the shape that suits you best. With the right nail tools and a little practice, it’s easy to transform your nails into a look that makes you feel confident every time you glance at your hands!
Ready to shape your nails at home? Explore our Nail Care Collection and build your own kit with files, buffers, strengtheners, and more.
With Ella+Mila’s clean, high-quality essentials, you’ll have everything you need to shape, shine, and show off your best nails yet.


